
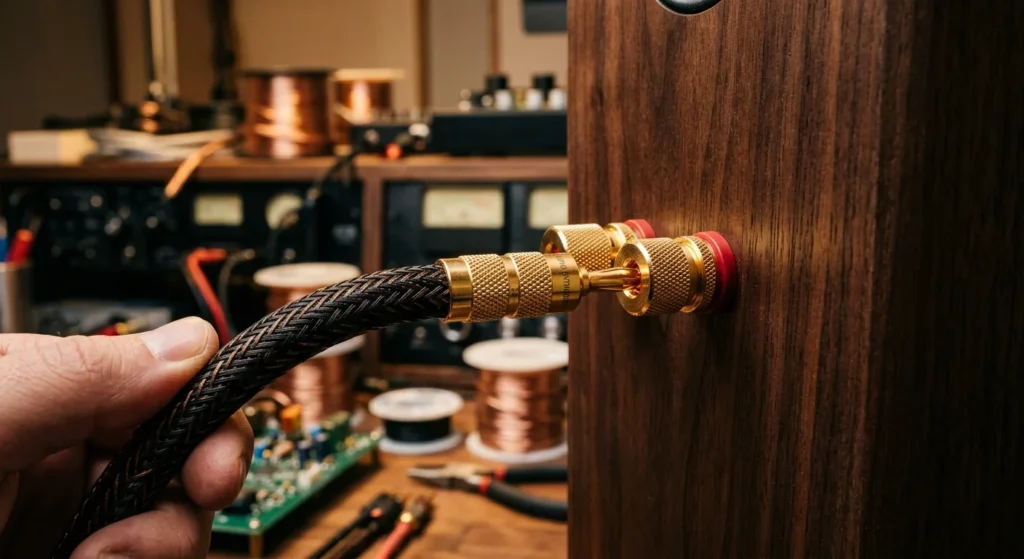
You compromise a custom audio build when you select poor speaker binding posts. You use these speaker terminals to connect your amplifier wire directly to your crossover. You gain maximum current transfer and lower electrical resistance when you choose machined gold-plated copper over cast brass.
Beyond material specs, you must match your physical hardware to your mounting surface. DIY cabinet builders install heavy posts into plastic terminal cups for airtight enclosure seals. If you run home theater wiring, you mount your connections onto a speaker wall plate. High-grade posts allow you to clamp thick bare wire, spade lugs, or banana plugs without stripping threads. You use nylon isolation washers to prevent short circuits on metal panels.
We evaluated thread precision, dielectric insulation, and conductor purity across brands like Dayton Audio and WBT. You will find the exact components you need for your cabinet design and power requirements.
Types of Speaker Binding Posts and Connection Styles
You select your speaker terminals based on your enclosure material, power demands, and preferred cable terminations. Consequently, you evaluate the physical layout of your cabinet before you buy any hardware. You choose a 5-way binding post when you need maximum flexibility for swapping cables during testing. As a result, you connect banana plugs, spade connectors, or bare wire to a single terminal setup.
When you build thick MDF cabinets, you mount long-threaded gold-plated posts directly through the wooden walls. For thin panel enclosures or quick retrofits, you install pre-mounted terminal cups to maintain a tight seal. Additionally, you pick a dedicated speaker wall plate when you route audio cables through room walls. You preserve your signal path when you torque your connections down with high-tension hardware.
The Versatile 5-Way Binding Post Explained
You select a 5-way binding post when you need total cable flexibility for your speaker terminals. Consequently, you evaluate the knurled cap design to ensure you can apply high hand-tightening torque on spade connectors or raw conductor strands. You verify that the post features a standard 4 mm center receptacle for banana plugs. Furthermore, you check the cross-hole diameter to confirm it accepts your target wire gauge without pinching the wire strands.
You choose gold-plated solid copper or high-grade brass posts to eliminate surface oxidation. As a result, you maintain low contact resistance without signal degradation over time. You inspect the threaded shaft length before buying because thick cabinet walls require extended mounting shanks. In addition, you select posts with integrated knurled collar nuts to lock the hardware permanently against the panel. You bypass flimsy stamped hardware and install machined solid posts to prevent thread failure under high cable tension.
Compatibility with Banana Plugs, Spade Connectors, and Bare Wire
You match your terminal selection to your preferred termination hardware to secure optimal conductivity. As a result, you eliminate mechanical play at the contact surface. You select standard 4 mm dual-entry posts when you run cables terminated with banana plugs. Consequently, you achieve quick plug-and-play insertion without loosening the outer collar.
You choose wide-flange posts when you install spade connectors. As a result, the flat collar clamps the fork wire end firmly against the conductor base without twisting the spade out of alignment. You inspect the cross-hole size when you connect heavy gauge bare wire. Consequently, you prevent strand shearing while clamping down 10 AWG or 12 AWG copper lines.
You select solid copper or brass gold-plated speaker terminals to maintain maximum surface contact across all three termination types. As a result, you prevent air exposure from tarnishing the conductive metal. You verify the internal clearance of your cabinet before buying long-shank hardware for heavy speaker enclosure walls. Consequently, you ensure proper thread engagement whether you solder your internal lead wires or slip on quick-disconnect push-on lugs.
Pre-Mounted Terminal Cups and Speaker Wall Plates
You select pre-mounted terminal cups when working with thin cabinet panels to bypass custom shank mounting. As a result, you preserve an airtight enclosure seal without drilling multiple isolated hole patterns.
You choose round or rectangular molded Terminal Cups with pre-installed Gold-Plated 5-Way Binding Post units for rapid assembly. As a result, you compress cabinet preparation down to a single cup cutout. You press the foam gasket tightly against the recessed flange during installation. Consequently, you eliminate acoustic leaks around the Speaker Terminals under high internal cabinet pressures.
You select a heavy-duty Speaker Wall Plate when you route passive signal lines through drywall or home theater partitions. As a result, you terminate in-wall wiring directly into clean wall-mounted hardware. You choose plates featuring dual-sided rear binding posts to accept Banana Plugs or Spade Connectors inside the wall cavity. Consequently, you maintain solid metal contact while protecting your permanent cable runs from mechanical strain.
Material Specs: Gold, Copper, and Brass Speaker Terminals
You evaluate the core metallurgic specs of raw copper versus brass when selecting high-performance Speaker Terminals for your enclosure. As a result, you optimize electrical conductivity while protecting your crossover network from unnecessary resistance.
You choose high-purity tellurium copper conductors over standard machined brass alloys for your primary signal paths. Consequently, you minimize insertion loss and keep signal transfer linear at elevated output levels.
You select heavy-duty brass post bodies when your cabinet hardware requires maximum mechanical torque and thread strength. As a result, you prevent hardware stripping while maintaining a tight clamping force on thick Spade Connectors.
You specify Gold-Plated contact surfaces across all raw copper or brass terminal junctions. Consequently, you stop atmospheric oxidation from degrading conductivity over extended operational lifespans.
You verify that the micro-thin gold layer directly bonds to a non-magnetic copper substrate without intermediate nickel barriers. Therefore, you eliminate hysteresis distortion and preserve high-frequency signal purity.
You match these material specs to your chosen interface, whether inserting Banana Plugs or securing bare wire into a solid 5-Way Binding Post. As a result, you guarantee uncompromised current delivery and reliable hardware integrity across every audio build.
Base Metals: High-Purity Copper vs. Brass Conductors
You evaluate the total current draw and mechanical load of your audio build before buying base metal Speaker Terminals. As a result, you choose solid tellurium copper conductors for high-power subwoofers and high-purity brass for standard domestic enclosures.
You examine the internal threading and stud diameter of each 5-Way Binding Post to confirm it accepts thick Spade Connectors without stripping. Consequently, you maintain maximum mechanical clamping pressure while preventing signal degradation over time.
You select individual chassis-mount posts over cheap Terminal Cups when installing heavy gauge internal wire inside thick MDF cabinets. Therefore, you eliminate air leaks around the cabinet cutout and bypass flimsy plastic housing failures under heavy acoustic vibration.
You inspect the raw substrate to verify the Gold-Plated coating directly covers high-purity copper or brass rather than cheap zinc alloys. As a result, you secure maximum surface contact for incoming Banana Plugs and eliminate interface resistance at the terminal point.
You specify solid brass hardware on a dedicated Speaker Wall Plate when running long cable paths through home theater walls. Consequently, you achieve high structural rigidity against repeated cable tension without fracturing the mounting plate.
Plating Options: Gold, Nickel, and Rhodium Coatings
You extend this same mechanical rigor to your choice of surface plating across all custom speaker terminals. You select direct gold-plated coatings when building fixed reference-grade system connections. Consequently, you achieve minimum electrical contact resistance without risking surface oxidation over decades of static use.
You specify rhodium plating over bare copper for high-cycle testing rigs or frequent cable swapping. Therefore, you prevent physical wear and scratch degradation on the contact face when continuously inserting heavy spade connectors or spring-loaded banana plugs.
You avoid nickel underlayers beneath outer precious metal coatings on high-end 5-way binding post assemblies. As a result, you eliminate parasitic magnetic hysteresis that distorts delicate high-frequency audio signals at the junction point.
You deploy nickel-plated brass hardware strictly on budget commercial builds or utility terminal cups. Consequently, you trade absolute signal purity for maximum mechanical durability and corrosion resistance in humid environments.
You match the plating material of your incoming wire terminations directly to the surface metal of the binding post. Therefore, you prevent galvanic corrosion between dissimilar metals and maintain a pristine signal path over time.
Insulating Shells and Cabinet Isolation
After matching your surface metals to prevent corrosion, you isolate the conductive shafts from the speaker cabinet using non-resonant insulating shells.
You select high-density polycarbonate or Delrin bodies for your individual Speaker Terminals when designing dense driver arrays. Consequently, you prevent short circuits if bare wire strands or heavy Spade Connectors swing into adjacent posts. You fit non-conductive shoulder washers into drilled panel holes before tightening the rear retaining nuts. As a result, you block electrical conductivity between the metal shaft and aluminum rear plates or conductive carbon composite panels.
You place compressed rubber O-rings between the outer post shoulder and the wood enclosure face. Therefore, you seal the cabinet against high-pressure air leaks without degrading acoustic output. You reject flimsy plastic Terminal Cups on high-output subwoofer cabinets. Consequently, you eliminate acoustic panel chatter and structural flex during high-excursion driver movements. You mount isolated 5-Way Binding Post hardware directly through thick MDF walls to maintain structural rigidity.
Brand & Price Guide: Budget to High-End Audiophile Upgrades
You evaluate your system performance requirements and budget parameters before purchasing audio hardware. Consequently, you match the mechanical precision of your Speaker Terminals directly to the resolution of your amplifier and driver array.
You select entry-level brass components from manufacturers like Dayton Audio or Bennic for utility builds and background channels. As a result, you secure durable Gold-Plated connection points that accept standard Banana Plugs and heavy Spade Connectors at minimal cost. You install pre-assembled plastic Terminal Cups or a recessed Speaker Wall Plate in high-traffic commercial installations. Consequently, you accelerate cabinet assembly while keeping raw material expenses low.
You specify high-purity tellurium copper or solid silver posts from WBT, Furutech, or Cardas for high-resolution reference systems. Therefore, you maximize electrical conductivity and eliminate signal attenuation across the connection interface. You install low-mass direct-plated 5-Way Binding Post hardware on high-end crossover outputs. As a result, you prevent capacitive energy storage and maintain full signal transparency.
Entry-Level & DIY Options (Dayton Audio, Bennic)
You evaluate budget-friendly Speaker Terminals from Dayton Audio and Bennic for cost-sensitive projects. Consequently, you obtain reliable mechanical clamping without overspending on vanity plating.
You mount machined brass 5-Way Binding Post hardware directly into cabinet walls for custom DIY speaker builds. As a result, you ensure a solid mechanical connection that accepts raw wire, Spade Connectors, and Banana Plugs.
You select glass-filled nylon Terminal Cups with pre-installed Gold-Plated posts for quick enclosure builds. Therefore, you seal the cabinet cutout against air leaks while speeding up driver wiring.
You compare generic zinc alloy connectors against Dayton Audio heavy-duty binding posts. Consequently, you avoid brittle shafts that snap during high-torque installation.
You select Bennic post assemblies for entry-level crossover networks. As a result, you keep parasitic resistance low while staying within strict component budgets.
You solder crossover output leads directly to the rear tab of entry-level posts. Therefore, you eliminate intermediate crimp resistance and secure a gas-tight junction.
You wire commercial background speakers using a standardized Speaker Wall Plate equipped with screw terminals. As a result, you streamline room integration and simplify long-term servicing.
Premium Audiophile Components (WBT, Furutech, Cardas)
You upgrade to high-mass WBT pure copper binding posts. Consequently, you minimize signal reflection and eliminate eddy current distortion in high-resolution audio paths.
You select Furutech alpha-copper Speaker Terminals featuring rhodium plating. As a result, you prevent contact surface oxidation while maintaining maximum conductivity under continuous clamping pressure.
You specify Cardas solid copper 5-Way Binding Post assemblies for low-impedance speaker cabinets. Therefore, you eliminate internal resistance spikes at the contact interface.
You torque low-mass Nextgen connectors directly onto non-conductive mounting plates. As a consequence, you isolate raw conductor pathways from electromagnetic interaction with metal cabinet panels.
You pair premium milled Spade Connectors with spring-loaded audiophile terminals. Thus, you maintain continuous contact pressure during extreme low-frequency driver excursions.
You insert locking Banana Plugs into pure silver high-end terminal shafts. Consequently, you establish a gas-tight junction without galling delicate metal threads.
You evaluate solid tellurium copper posts against standard brass designs. As a result, you achieve significantly higher electrical conductivity across the entire audio frequency band.
You bypass pre-assembled Terminal Cups by installing isolated single-point Furutech posts directly through thick cabinet walls. Therefore, you preserve enclosure rigidity while preventing structural air leakage.
How to Select and Install Speaker Binding Posts
You select solid tellurium copper 5-Way Binding Post hardware over cast brass alternatives. As a result, you maximize signal transfer efficiency across high-current audio pathways.
You match heavy-gauge bare wire and locking Banana Plugs to premium Gold-Plated conductors. Consequently, you prevent long-term surface oxidation while maintaining pristine signal transmission.
You install recessed Terminal Cups on commercial cabinet builds or thread individual Speaker Terminals through custom MDF panels. Therefore, you customize enclosure mounting depth to suit your specific acoustic design requirements.
You clamp heavy Spade Connectors onto high-mass threaded shafts. Thus, you establish continuous, low-resistance mechanical contact capable of handling extreme continuous power loads.
You mount dual-isolated binding posts directly onto a dedicated Speaker Wall Plate for clean in-wall installations. As a consequence, you protect raw wire terminations from physical strain and short-circuit hazards.
Measure cabinet panel thickness with calipers before buying hardware. Leave half an inch of exposed thread inside the enclosure to seat nylon shoulder washers and locknuts.
Drill stepped clearance holes to fit non-conductive shoulder washers. Step-boring keeps raw metal threads away from cabinet linings, isolating high-current signal paths from grounding faults.
Select 1.5-inch long-shaft posts when mounting through standard 0.75-inch MDF panels. You gain room for internal spade terminals and dual locking nuts without thinning cabinet stock.
Route flat counterbores into exterior panel faces before cutting pass-through holes. Recessing binding post bases protects gold-plated terminals from impact damage while allowing full torque on rear hex nuts.
Match drill bit sizes to manufacturer specification sheets. Loose clearance holes leak internal box pressure past post threads, creating cabinet chuffing under heavy bass loads. Apply silicone sealant behind rear washers to secure a gas-tight seal.
Termination Methods: Soldering vs. Screw-Tension Fasteners
You heat rear terminal lugs directly with a high-wattage iron when soldering internal crossovers to solid 5-Way Binding Post shafts. Consequently, you achieve rapid heat transfer that forms an ideal intermetallic bond without melting surrounding nylon insulation.
You tighten set-screw tension fasteners using precision hex drivers during internal terminal assembly. As a result, you compress internal wire strands into solid copper junctions without applying excess thermal stress to conductor insulation.
You strip clean wire ends before inserting multi-strand lead wire into dual set-screw Speaker Terminals. Therefore, you prevent stray wire strands from causing internal shorts across opposite polarity paths.
You slide crimped copper ferrules over stranded internal wire before driving tension screws into heavy Gold-Plated terminal barrels. Thus, you prevent screw threads from cutting raw wire strands while preserving maximum surface contact area.
You seal exposed solder joint tails and screw terminals with heavy-wall polyolefin heat-shrink tubing behind panel-mounted Terminal Cups. As a consequence, you shield high-current internal signal paths from short-circuit risks and back-wave cabinet pressure.
You choose heavy-duty screw-tension posts over solder tabs when mounting high-current crossovers to a custom Speaker Wall Plate. Consequently, you streamline future crossover modifications while ensuring high-torque mechanical grip under extreme acoustic vibration.
FAQ About speaker binding posts
Do gold-plated speaker binding posts actually improve sound quality?
You do not get improved sound quality from gold plating. Copper offers higher electrical conductivity than gold, so you hear the same audio performance from clean copper as from gold. You will not hear clearer treble or deeper bass by choosing gold connectors.
Gold matters because it stops corrosion. Bare copper reacts with oxygen, forming a dull layer that blocks electrical flow over time. Gold does not tarnish, so your signal path stays clean for decades. If you live in a humid climate, you need gold posts to prevent signal loss. For a practical setup tip, attach gold-plated banana plugs to your speaker wires to keep your connections tight.
What wire gauges and connector types fit standard binding posts?
You can attach bare speaker wire, banana plugs, spade connectors, and pin connectors to standard binding posts. You can run wire sizes from 8 to 18 AWG, though you will find 12 to 16 AWG easiest to manage. You push 4mm banana connectors into the open hole at the tip of the post. For spade connectors, you slide the notched fork around the metal collar and screw the cap against the fork.
When you use bare wire, you strip half an inch of insulation from the end and twist the copper strands into a firm bundle. You thread the wire through the cross-hole in the post and turn the cap until you clamp the connection. You protect your amplifier from short circuits by keeping stray wire strands clear of adjacent terminals.
How do I replace broken binding posts on an existing speaker cabinet?
Unplug your speaker before starting work. Unscrew the terminal plate from the back of the cabinet and pull it out to expose the wiring. You will see two wires attached to the broken posts inside. Take a photo of these wires with your phone so you match the correct wire colors to the positive red terminal and negative black terminal. Disconnect the wires using a soldering iron or by pulling off the spade connectors.
Unscrew the nuts holding the old posts to the plate and pull the broken hardware out. Insert your new binding posts into the holes, slip the washers over the threads, and tighten the hex nuts with a wrench. Attach the speaker wires to the new terminals using your photo as a guide. Push the terminal plate back into the cabinet cut-out and tighten the mounting screws.